The time has come for me to sort out my stash. The studio has increasingly become a dumping ground for my accidental yarn purchases, and consequently I don't know what I have or where it's kept. I have also got to sort out my desk ready for the start of my next module at the Open University. So I've been to the dreaded hell hole that is IKEA and bought, well, lots...
So, IKEA, you say flat pack costs less, wastes less space and is generally going to save the planet hey? So why the enormous box for this tiny packet of screws and dowels?
OK, I'm all laid out and ready to go. Oh, in the instructions it says this is a two man job. Well, I'm on my own here as I don't think Pip counts as a man in this situation... This should be fun!
Oops - a work related injury already, as I tried to open the box of screwdrivers.
How hard can it be?
So far, so good.
This is easy. Two men? I don't think so.
OK, so being two people would be kind of handy about now...
And now...
Quick quality inspection by Pip. Hahahaha it looks like he's taking the credit for hammering the backboard to the bookcase. He's SO clever my Pip.
And I'm done!
Oh good god, I didn't realise the stash was THAT big. I had anticipated also putting my crochet and knitting books on this shelf... AND my sewing machines.
I'm pretty darned well pleased with this. I have been scouring the second hand shops for different coloured penguin titles to frame like this for years - finally they are all done and put into box frames, and I put up a picture shelf to display them.
And all this started because of that AMAZING retro orange Anglepoise lamp, bought from the lovely Sophie at Pineapple Retro. It goes pretty well with the fab leather swivel chair that used to belong to my friend way back in the day when she still lived in the UK and was hair-dressing for a living. I LOVE my chair :-) In fact, I love my studio now too!
This past couple of weeks I've been working on some alley cats. The pattern is from http://www.stipenhaak.blogspot.nl/p/mijn-patronen.html. The pattern came in Dutch, but with the relevant crochet terms translated into English, so it was easy enough to translate (with the help of google translate!). The cat is the pattern called 'Kater Theo (inclusief Muis Fiep)'.
The pattern is worked in the round, and I adjusted it slightly so that I used a magic circle start rather than two chain. I didscovered that stitch markers make a neat easy way to hold the work while you make the stitches into the magic circle. No more fumble fingers for me!
This is the story of how Bob Cat and Purple Pip arrived...
Bottom's up!
Beady eyes...
Hello, anyone for skittles?
Ah, that's better - what a difference a nose and muzzle makes.
And ears...
Arms and legs ready...
And we've got an alley cat.
He's quite a model this cat.
And now he has whiskers, he's complete.
My friend saw a picture of Bob Cat and wanted one too. She chose the colours and the name. And so Purple Pip was born...
Ready for assembly.
Welcome to the world Purple Pip.
Looking a little bewildered by it all.
My friend sings in the choir at The Proms in the Albert Hall every year, and Purple Pip will be accompanying her this year. Enjoy your Prom Purple Pip! You never know, he might end up on the telly.
As a sufferer or depression, I find myself clutching at anything that makes me happy. Bright colours and flowers cheer me up on days with the blues.
And sitting in the sunshine, topping up the vitamin D levels too.
When I'm depressed I find my concentration span is very short and crochet and knitting become infinitely more difficult. So I thought I'd share these little gems, simple enough to do when you're feeling a bit flakey or you want to watch telly at the same time as doing a spot of crochet, and small enough to complete in one sitting. I was inspired by the Attic 24 blog, in which Lucy covers a herb pot. I've modified the concept somewhat and interpreted this lovely idea in my own way.

For my first attempt I used lovely bright colours, similar to those Lucy uses on hers - with all these colours to choose from I found myself wanting to use ALL THE COLOURS because they're so vibrant and happy. But to make the cover more durable, I used a 10.5cm diameter galvanised pot holder I had bought some years ago in Ikea for a few pounds - it is the perfect size to pop a basil plant bought at the supermarket into - and it stops water going all over the sleeve and shelf when you water the plant. I used Rico Essentials Cotton Aran with a 3.5mm hook to give the pot sleeve some substance.
I added a simple flower to the bright stripey sleeve, and embellished it with a bit of very easy, basic embroidery (I am no embroiderer!)
Do be careful using this sort of yarn - it's very stranded and you can easily pull threads or miss a thread when pulling your hook through. Despite using plain double crochet and some treble crochets for the flower, I managed to miss a thread on the top right petal of my flower, but I didn't realise until AFTER I'd embroidered it onto the pot sleeve. Grrr!
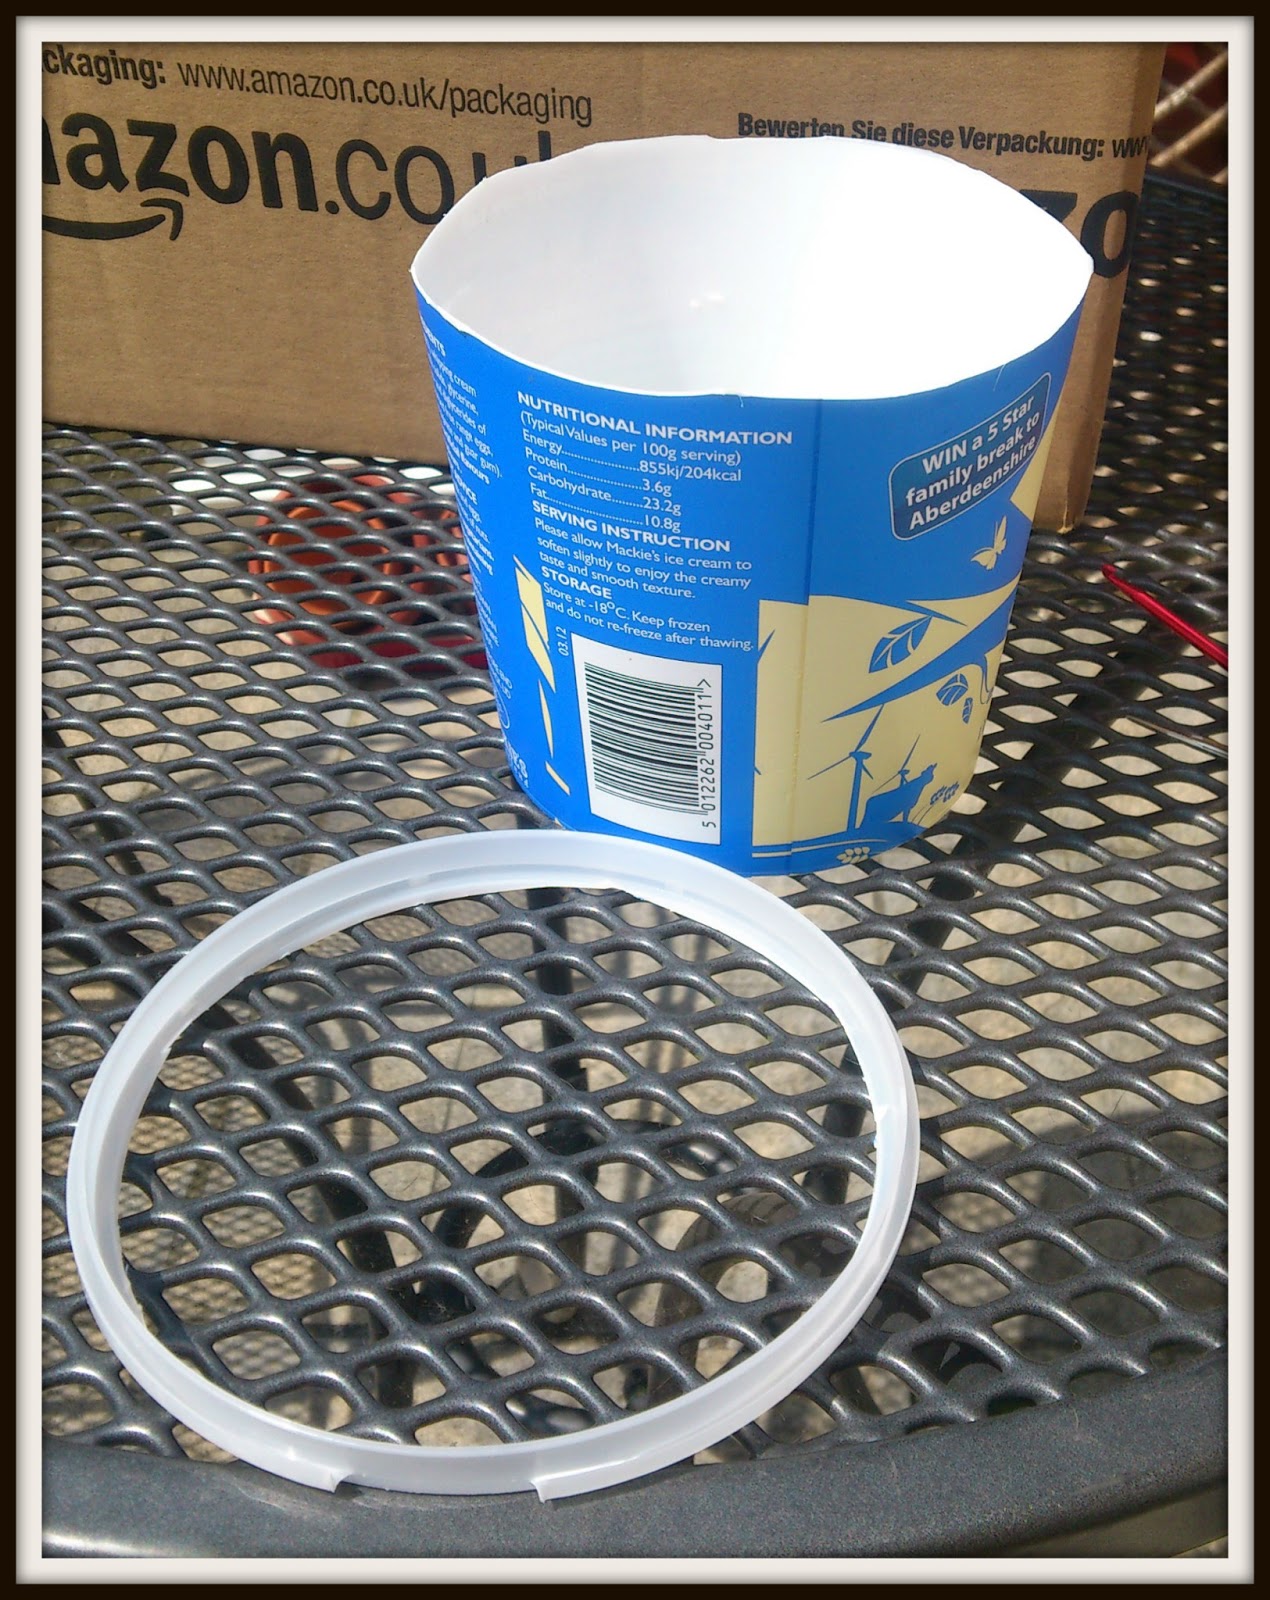
Once I had made this pot sleeve I remembered the spider plant lurking in my bathroom - it had out-grown its pot, so I thought I'd have a go at potting it on and make another pot sleeve for it. I didn't have any suitable planters for this, so I improvised with an ice cream container.
Using a craft knife I carefully cut the rim of the container away since the tab to open the ice cream was rather unsightly. My cut was a bit wobbly but that's OK - your sleeve covers it!
To make my pot sleeve more personal - and a bit different - I decided to have a go at a chevron stitch rather than plain stripes - this design is based around a 9 stitch repeat, so I made sure that I used a multiple of 9 in my foundation chain. The chevron is really simple - 3 trebles, 3 trebles in same stitch (this makes the peak), three trebles, and three trebles together (this makes the trough). You just repeat this pattern to create a nice simple chevron.
Now to repot the spider plant... Disaster struck! I am not naturally green fingered, so imagine my horror when I discovered the spider plant was too fat around its root ball to fit in the new pot! Oh no... So I girt my loins (so to speak) and chopped the plant into three. There were, admittedly, three main stems of plant in the pot. It was a bit scary chopping it up, but I have been assured by a green-fingered friend that the spider will survive. Phew! Now to find two more pots... And cover them :-)

I have a slightly sad confession to make... I will willingly pay extra to have my food packaged in something nice - and these olive oil tins were no exception. I could imagine infinite possibilities for them after the oil was finished. I used my fancy new "safe" tin opener to cut the top of the can off. This tin opener is brilliant - it cuts the lid off without ever spilling the contents of the tin. How many times have I tipped tomatoes all over myself, or had the tuna leak water over the work tops? AND the cut is made magically safe - you can actually run your fingers along the top of the can after it's cut and not slice open your finger. If that weren't enough, it comes in red, pink, lime green and turquoise!!!
That's enough bragging about my tin opener - when I get so dull that a tin opener makes me happy? Well, make the most of these moments of joy!
So now I have two more plants that need a sleeve. One is going to sit on my desk in my studio. I've recently decorated in there and there's a colour scheme of pink, green and cream - with splashes of colour (of course!). So I made a stripey sleeve, this time in half-trebles, with a scalloped edge along the top.
Oopsie! I finished a wee bit prematurely. Oh well, I added another row and a scalloped edge to the bottom of the sleeve to even it up. But these pastel stripes are a bit boring. So I had a wee rummage in my yarn cupboard and got some Rico Essential Cotton DK out - again it comes in vivid rainbow colours - and using a 2.5mm hook made myself some little flowers, then embroidered them again. This time I made 5 flowers - all different sizes and stitches and heights. I just made them up as I went along. I made up the embroidery as I went along too!

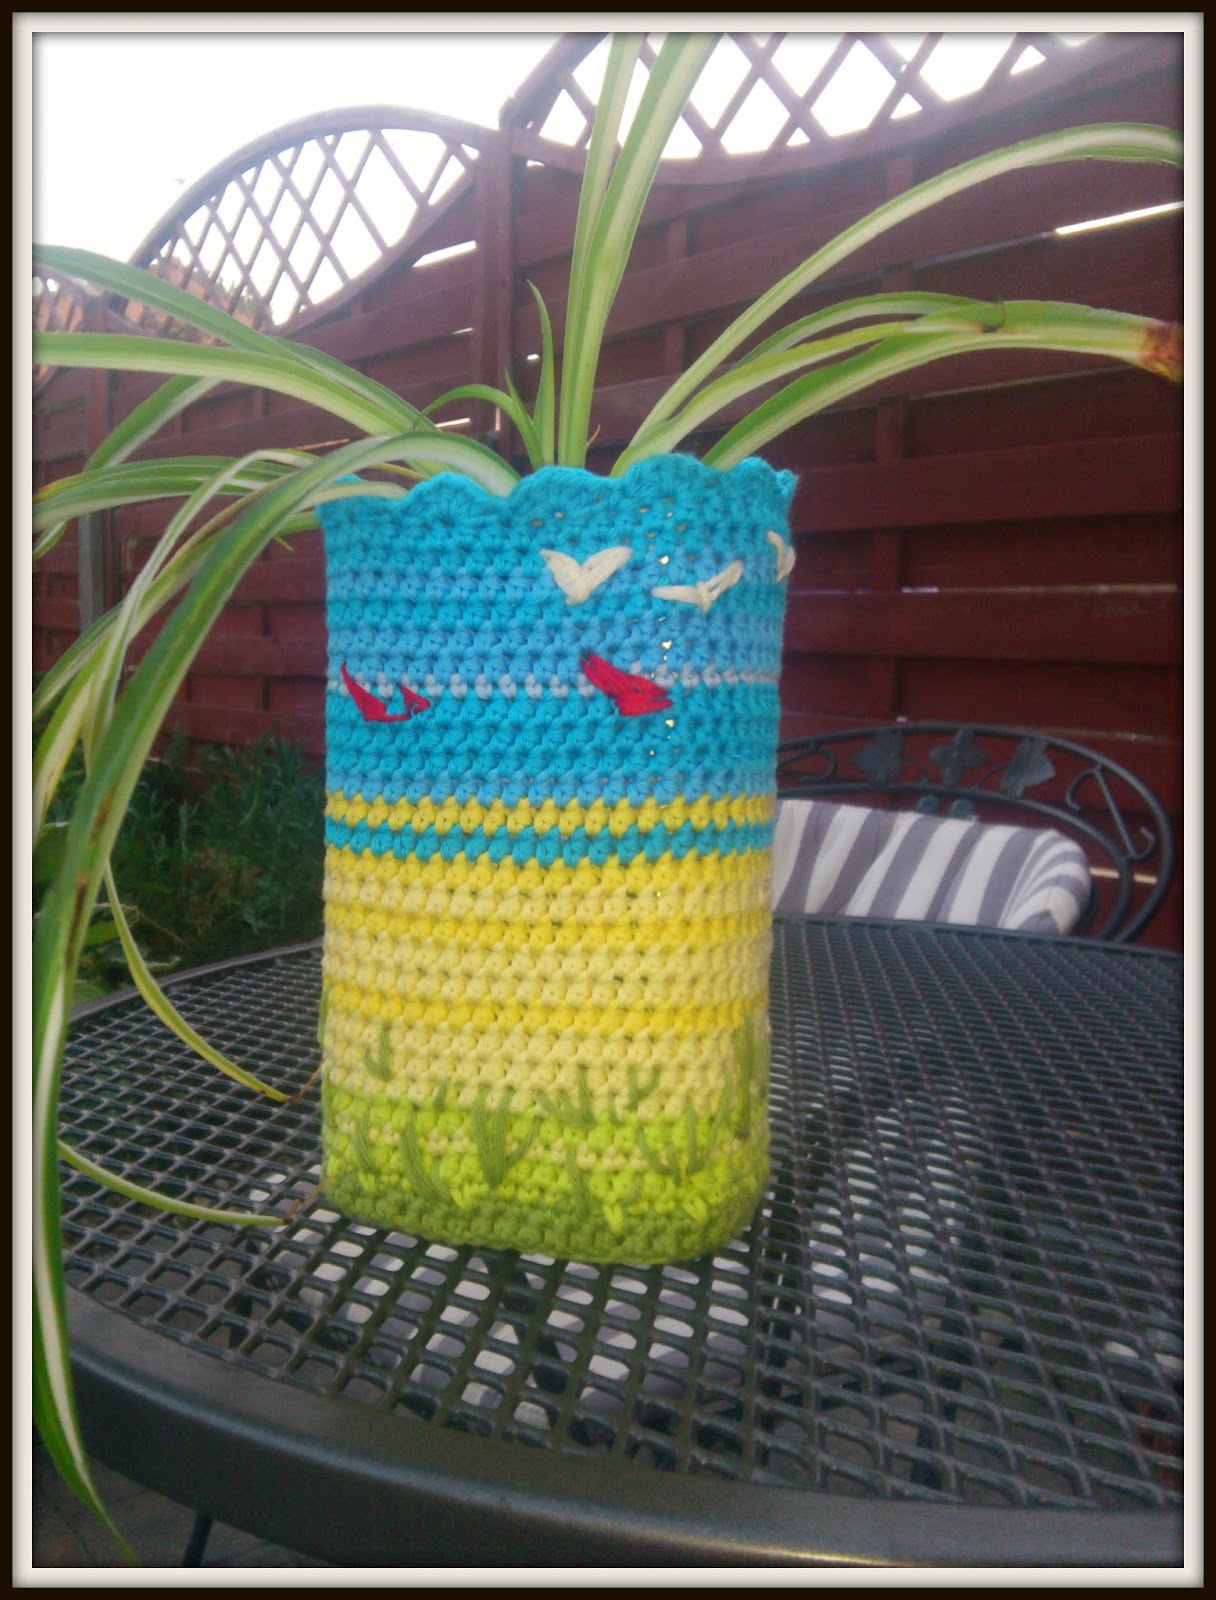
So, one more to go. This time I plan on keeping the plant in the bathroom. I really want to decorate my bathroom, and plan to have it fairly plain (white) with chrome accessories, some of my stained glass mirrors and nice new fluffy green towels. So it will be crying out for a splash colour. Looking around for some inspiration I spotted a painting I keep on my dresser - a gift from my sister and her children at Christmas. It's a sea scape with vibrant turquoise water and sky. I had some yarns that leant themselves to reproducing a seascape, and made stripes of greens, yellows and blues. Then, using more of the Rico DK yarn (which has a nice sheen like thick embroidery floss) I embellished the sleeve with some gulls, some grasses and a few sail boats.
I think I could do with a bit of practice with my embroidery, but I rather like how this turned out. It was like painting with yarn - really fun to do.
So, never throw away containers, you never know when they could be useful. And keep your yarn scraps and use them for some little projects like these. Giving a room a splash of bright colour is cheep and easy and fun. And when you get fed up with it and fancy a change, you just whip the sleeve off your pot and make yourself a new one.
Happy hooking xx
I can't believe I've done it again! Yes, Horace has a girlfriend. She is called Hermione, and she is a Lesser spotted Bristolian Elephant - native to bedrooms in the West Country of the UK. Be warned, you may want to wear your sunglasses reading this post.
I haven't taken photos along the way while making Hermione, as the process was much the same as the making of Horace, but she came from a pattern by Heidi Bears. This post is going to be mainly pictures, in part because I was left speechless while constructing her front legs - I made an almighty muck up of following Heidi's instructions, and it took a few hours to locate my error (I had confused 3 motifs that Heidi's pictures showed ALL in blue and orange) and made the most bizarre looking shoulder growth... Hermione appeared to be shaped as though she was wearing a power suit with enormous shoulder pads, a la Dynasty (c. 1987). I'm pleased to say that I am laughing about it now, but at the time, the air turned blue!
I wanted a bright colour scheme, and boy, did I find one...
I've used Stylecraft Special DK yarn in cream, aspen and jaffa. I bought the jaffa and thought, Oh My! I'll never use that yarn - it's far too bright. But used in small quantities, I think it can be very effective.
I'm pretty speedy at making the African Flower motifs now.
So, without further ado, here is Hermione.
I had another serendipitous find in my handmade bead collection - the ones I made myself - and just happened to have made one in orange and turquoise. I never realised I was so keen on these colours! Here's a little close up of Hermione's bottom so you can see it properly. (Sorry Hermione, rather personal!)
I already have my orders to make another hippo and another elephant for birthday presents to my niece and nephew. I will be working on them during the summer - in between my many other planned projects. Something tells me this summer my fingers are going to be very busy!
I look forward to seeing your feedback about Hermione. I read all your comments and love receiving them. I've also managed to add two ways to follow this blog - up at the top right hand side of the page is a "join this site" button, and down here near the comments box there's a "subscribeby email" option. Now you have no excuse to miss a post xx
I am so excited to show you this post. I mentioned a couple of posts ago that I am making a Hippopotamus with my friend Karen. Well, it's time you met him. I've called him Horace.
 |
| Hello Horace! |
This is the story of how Horace came to be...
Karen and I enjoy making lots of things together, even though we live over a hundred miles apart, we meet up on Facebook and sit and chat while we crochet. We made hippos together using this pattern from Heidi Bears.
For Horace I raided my stash of yarn (which is now taking over my studio, depite having an enormous walk-in wardrobe of it's own!). I only used three balls - in fact, not even the whole ball. I used 75g cream, 72g shocking pink, 66g lime green.
This yarn is acrylic - it was also an absolute bargain at 50p (UK) a ball. Although the label says it is DK (that's double knit), I think it is actually more like 4 ply. Heidi Bears suggests using sock yarn, but I didn't have any spare sock yarn so this would have to do. I adjusted the hook to suit - you need to use a smaller hook than the one suggested by your yarn weight. So, since this has the appearance of 4 ply I went down from a 3mm hook, to a 2.5mm hook. Remember my lovely spiral hook I got from Hand-Crafted by Annie? Yes - this is the project I bought it for. It was really comfortable - using a plain old metal 2.5mm hook felt like I was crocheting with a paperclip - the spiral hook was a joy! Thanks Annie!
I won't repost the photos of me making the African Flower motifs, they are still here if you want to take a look...
Well after much chatting, giggling and frogging (it's darned hard to count to seven AND have a conversation you know!), we made all our motifs - there were quite a few of them!
The pattern contains the directions to make all these different shapes, and the construction instructions. I really recommend that you read the WHOLE pattern before you start - I discovered to my horror that I had re-make the ears because they aren't a standard hexagon! OK, it only took me half an hour to sort it out, but I was so near the finish line! The ears are the last bit. Oh well, luckily Heidi didn't hear my cursing ;-)
Heidi suggests that you use the join-as-you-go method. I seem to have a mental block on this and STILL can't manage it. She suggests that you can sew the hippo together if you prefer. Ut oh! I'm allergic to sewing! So, me being me, I made it up as I went along and used a DC (UK term - SC in USA terms) join. Since this makes a ridge where your seam goes, I decided to use the lime green yarn to construct Horace. The way I had arranged my colours, I'd hardly used any green as there was just a thin single round of it in the motifs. I'm quite pleased with the effect of this method :-)
A word of warning - read, double check, and re-read the instructions as you make your hippo - I had to keep unpicking mine - oh and count carefully! I managed to mis-count the side on one of the motifs and had to undo an hour's work. Boy was so annoyed! I also recommend pinning the pieces at each stage and comparing them to the pictures in the pattern - it saves a whole lot of heart ache I can assure you.
 |
| Legs |
The DC join lies in a particular direction - there is a definite ridge on the "right side" (ie the side facing you as you work), so I ad-libbed a bit with the instructions in order to give myself nice long seams to work along, so that the ridges all faced more or less the same direction. This is my interpretation of the neck end of the body:
 |
| Neck/Collar |
After much effort, I managed to construct Horace - although he did look rather like a gorilla at one point.
Now I was ready to stuff him. I used synthetic kapok toy filling that I got from Ebay - the hippo took a surprisingly large amount of the stuffing - 250g for one hippo. That's one hungry hippo! You need to stuff him carefully - sculpt him a bit with the filling to give him a nice friendly shape.
As I planned to use Horace as a doorstop, I needed to think of some kind of weight to fill him with since 250g of kapok won't stop much! I thought about using builder's sand or gravel, but thought it could get a bit messy - so I hit upon a cunning plan so cunning you could put a tail on it and call it a weasel. (OK, I nicked that line from Blackadder) Curtain weights are flat, round lead weights - I found them in John Lewis' curtain dept - 4 weights for £1.50. I put 8 weights in each foot, so now my hippo is heavy AND has flat feet!
Pip seemed quite perplexed by this stage...
 |
| What's that Mum? |
So I gave him Blue - his favourite smelly toy - to play with while I got on with Horace.
Oh dear, Blue doesn't seem as interesting as Horace.
Now the body was complete, it was time for the head. This bit was really fun as Horace took on a bit more character at each step.
There is no elegant way to add a hippo head, as I soon discovered. There's an awful lot of manoeuvring the body around and propping it between your legs. Thank goodness Pip was the only person who was watching me!
Now for some reason the pattern doesn't include a tail with it. Well, luckily that was easily remedied by knitting an i-cord. I used the lime green again, and two sock pins - double ended needles at 1.75mm size.
Cast on three stitches and knit them all - I had done a few rows before I remembered I should be taking photos!
Now shove all the stitches along to the other end of the needle.
And knit all the stitches again - depite the yarn being at the other end of the row, you just knit as normal, pulling the yarn across the back of your work. You will end up with a cord.
Keep repeating this until you have a tail the length you think looks good against the hippo. Cast off all the stitches as normal. And that's how you make an icord - very handy if you want a cord to match a hooded jumper you have knitted.
I finished off my tail with a glass bead I made myself. Yes, I made the bead myself! It was great fun - a Christmas gift from my sister to go and spend half a day learning how to make glass beads with a very dangerous blow torch and some skewers. It was really good fun! Sadly the Fireworks Studio in Bristol is now closed, but this little film clip shows you how it is done - if you look up "fireworks lampwork glass beads" in your area, you may find you can do a similar course. I made 12 beads that they put in their kiln to cool down under controlled conditions, and they posted them out to me within the week.
I confess, it was pure chance that I happened to make a bead in lime green with a pinky-orange swirl. Or should that be serendipitous?
Horace is complete!
I'm really pleased about how Horace turned out. I had my doubts at times, and I'll admit, I did find it rather boring making so many motifs all the same. But, now Horace is finished my pride at how he looks has over-ridden my doubts and I've forgotten how dull it was repeating the motifs - I imagine it's like child-birth. OK, it's probably not quite as bad as that, but you know what I mean...
Horace is now fully employed and standing guard at the bathroom door.
I hope you love Horace as much as I do. I think I know what someone will be getting for Christmas this year... Or maybe an elephant? But first, I need to finish some things!
I love to hear from you - if you'd like to leave me a comment, I read them all, and try to respond to all your comments. And now, I have discovered how to make it possible to follow my blog by email. If you would like to receive an email each time I blog, click the "subscribe by email" link below. I promise not to write too many posts and inundate you!