Tuesday, 2 July 2013

Travels from my armchair - part two

In keeping with the Indian theme of yesterday's post, the sun came out and it was boiling hot on the terrace.

Well, I promised you the recipe for my palak paneer, so here it is. My kitchen got cursed by the fact I had my camera with me and I had a bit of a sticky pan disaster - but not to worry, it still tasted divine :-)
You'll need oil, onion, chilli, minced garlic, ground turmeric, ground cumin, ground coriander, garam masala, spinach, a few tomatoes, coconut milk and your home made (or shop bought) paneer made with 2 litres of milk.
Cube the paneer into 1" pieces and fry in quite a bit of oil. Be warned it can jump around and spit as it cooks. You want to get it golden brown all over. The shop bought paneer holds it's shape better than the homemade version, but it is a bit rubbery. As you can see, my pan decided it wasn't going to behave so it got a liberal coating of paneer stuck to the bottom! Oh well, it's added to the texture. And of course, when I tried to prise it off the pan the paneer crumbled. Well, these disasters only happen when you've got guests coming to watch!


OK, now for a bit of multi-tasking. Steam the spinach (200g) in hardly any water. You want to cook it for only about 3 minutes so it's wilted but still bright green.

While that's cooking pop your chopped onion in to the pan, using the same oil - I always use red onions, same as Rick Stein, they have a sweeter taste that suits the India palette. Soften the onions, but don't colour them. The bits of what looks like breadcrumbs in my pan with the onions is that pesky stuck paneer!!!


Now add 0.5 teaspoon of turmeric, and one teaspoon each of ground cumin and ground coriander. If you like cumin you may want to use whole spice rather than powdered - or even both! Add a big dollop of minced garlic (probably about 3 cloves of crushed garlic) and the chilli, chopped quite small. Choose a chilli that suits your preference for heat. I like these chunky fat fairly mild chillis for this dish, it is supposed to be mild, sweet and creamy, so you don't want a birds eye chilli that blows your head off! This calls for subtle flavours. Cook off the spices - being careful not to let them burn


Drain the spinach and squeeze out as much liquid as you can - 6 sheets of kitchen towel does the job

Chop your tomatoes (I used 3) and add them and the spinach to the pan and give it a quick stir.
 Then add a whole can of coconut milk - this recipe is not for the dieter!
Add the golden paneer to the pan and leave it all to bubble away for about 15-20 minutes, making sure you don't catch the bottom of the pan. You will end up with a nice reduced masala sauce. Then stir in 1-2 teaspoons of garam masala and give it a couple of minutes. (oopsie - the camera steamed up!)

Chop up some fresh coriander and throw it in just before serving. I serve this with wild rice and some curried vegetables. The paneer is probably laden with calories, so a bit of veggie padding fills you up!

Enjoy your dinner, then retreat to the easy chair to digest...


I hope you enjoy trying palak paneer for yourself - would you like more of my Indian recipes? Let me know and I will include some more in future posts. xx

Monday, 1 July 2013

Travels from my armchair

Well two weeks of resting and recuperating from my end of year exam has left me feeling... hungry! I think 4 weeks of bad eating and even worse sleep caught up with me. A bit of R & R was required. So feet up, out in the garden with Pip and my hook has been my regular spot.
And when my hands started to ache, I read books that I had chosen myself - believe me, it wonderful to read for pleasure after a year of reading and studying nineteenth century novels. For a part time correspondence course, this module from The Open University has hard going! So I've read some modern and some contemporary fiction. BLISS! What a shame I can't read and crochet though... so I have no updates of interest to report about my rainbow blanket or my Hippopotamus just yet.

So, I thought I'd tell you about what I've been up to... As I say, I've recovered my appetite for good food - and for me good food means CURRY. And by some extraordinary coincidence, Rick Stein has a new TV show about his travels around India collecting and adapting Indian recipes. So immediately went out and bought the book that accompanies the series...
Hey hang on a minute, how did a second book get into my basket?
Marvellous.

Reading through these books reminded me of my own Indian Odyssey. I was lucky enough to travel around India in 2001 - I can't believe it's 12 years ago. I can still smell India, and taste the food, as if it were yesterday.


Lorries by TATA - these carried people on the ROOF and were often highly decorated, and always to be heard tooting their horns
India is chaos - I kid you not, it's just nuts. Traffic fumes everywhere, noise everywhere and people... yes, they're everywhere too!


Train station at Gorakhpur

I was really fortunate when I visited India. I was part of a group of people who went there to help at a free school and at health centres. We also distributed food in some of the more remote villages in Bihar. I can't imagine getting another opportunity to meet real people and see how they live - nor to experience such generosity among really really poverty striken families. And we made friends for life with the family who hosted us and whose work the school and health camps are.
Grace School


Health Camp - villagers are listening to a talk on the importance of boiling water

After spending time in the remote northern region of Bihar, a few of us went travelling around - here's a few of my favourite snaps.
Mist over the Taj Mahal at dawn


Me looking really rather young


Really random... This child was plonked on my lap by a family who wanted a picture of me with the wife and baby!


The Merchant Palace at Udaipur - now THAT's what I call decor!

It was while we stayed at The Merchant's Palace in Udaipur that I tasted paneer for the first time. It's basically a kind of cottage cheese - in India it was made with buffalo milk - great news for me as I am allergic to cow's milk, but I LOVE cheese. Here in UK you can buy paneer ready made, but it's made using cow milk, so I make my own from full fat goat's milk. I thought I'd share how...

You will need:
2 litres full fat milk
3 tbsp lemon juice or white vinegar
 

To make paneer you need to use full fat milk - 2 litres for 4 people. Put it in a pan and heat it gently until it boils.


You use 3 tbsp lemon juice or white vinegar to make the hot milk separate in curds and whey. 


OK - the milk's boiling.


Add the lemon juice.


Line a colandar with a clean tea towel and tip the contents of the pan in - try not to splash yourself!


When the whey has drained through the cloth, scrunch up the cloth and press down hard to squeeze as much whey out as you can.


Use the milk pan filled with water as a weight to squeeze out as much liquid as possible - leave it for an hour or so in the sink to drain.


Line a container with strong kitchen towel.


The curd is left behind in the tea towel. Now you can make a block of the cheese.


Scrape the curds off the tea towel (I'm a miser so I literally scrape every last crumb of curds off! Don't want to waste any) and fill your lined box. Press down with the back of a spoon to make an even layer of cheese.


Bring the sides of your paper towel over the top of the cheese and pop in the fridge.

Once the cheese is chilled you can cook with it. I love palak paneer and will be making some later today. Cheese, spinach, curry - HEAVEN!

PS apologies for the slightly odd photos - I tried saving them with transparent backgrounds - thought I'd cracked it, but they've got black backgrounds instead. Damn you technology!


I love to hear your comments about my blog. Let me know if you tackle home made paneer yourself. I'll be posting my palak paneer recipe - and some photos of my dinner - soon :-)

Tuesday, 25 June 2013

WIPs, chains and hooks

Hee hee - that got your attention! I thought I'd update you on a few things I'm still working on - yes, the dreaded Work in Progress (WIP), and my new hook. OK, I haven't got any chains, but, I have bought myself some stitch counters, do they count?

OK, let's start with my stitch sampler blanket. I started this project way back in April, and I have made progress on it since my last post. But then I made a boo boo and I've lost heart a bit. It happens sometimes, and its the price we pay for blazing our own creative trail. But I have to brace myself for a frogging session before I can move on.

I added some new stitches

This pale lavender stripe turned out to be a bit open. Oopsie number one. But that's ok, I stitched behind it with a few dc stripes and that was rescued.

Then I added some really lovely, time consuming stitches


Lovely, I thought. These are really gorgeous. Then I realised I'd made a boo boo. Lying the blanket on the floor to take some pictures I realised (with tears in my eyes) that my blanket had shrunk! Somehow I've managed to lose a whole load of stitches. Oh, my disappointment! I kicked myself and frogged some rows, but still the blanket is smaller on the working end than on the starting end.

When my family came for a visit we gave the blanket a good heave ho and the really fancy stitches have grown a bit wider. I am hoping with all my heart that blocking will sort it out. Meanwhile, I need to frog a bit more, probably back to the red and pink stripe, to try and rescue the situation. I think that's where my counting went awry. But I shall be winding the yarn up with tears rolling down my cheeks I'm sure.

Just goes to show that counting is very important in crochet. Rookie error from me has lost me hours and hours of work :-(

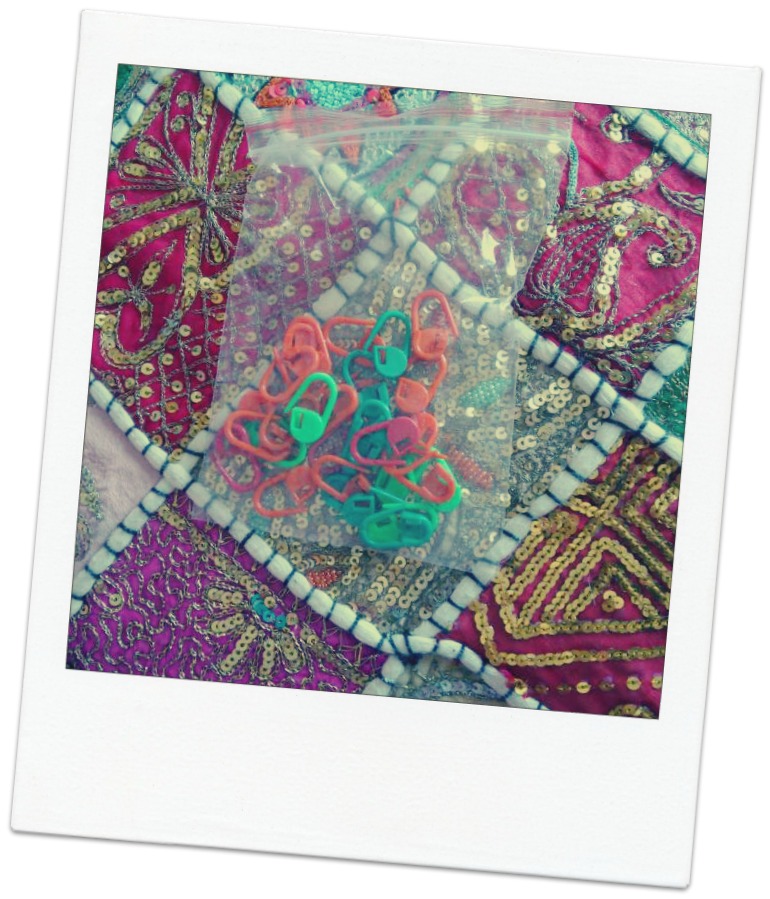
So, I have armed myself with a new toy... Stitch markers!


These rather naff plastic things are going to save me from tears in the future - I just have to REMEMBER TO USE THEM! :-)


Another little project I'm working on with my friend is a HAPPYPOTAMUS - it's from a pattern by Heidi Bears, available to buy on Ravelry. Heidi Bears has made some really cute designs that use a beautiful African flower motif. I can't wait to see my finished hippo. Since I haven't got children of an age to enjoy a cuddly toy, I am going to weight the feet of my hippo and use him as a door-stop.

Since this pattern is not my own design, I won't be posting step by step instructions or anything - if you love the hippo too, buy yourself the pattern and have fun :-)

This is some pics I've taken as I'm working on him though...


And this new project meant I needed a new hook - I'm working with a diddy little 2.5mm hook so that the motifs are nice and dense - I don't want his stuffing falling out! I had a hook I could use, but it was a thin metal one and to be honest, it wasn't much fun to work with - it felt like I was trying to crochet with a paperclip. In the past I have made my own hook handles with polymer clay, but with somewhat limited success. If you go back up the page you can see a red spotty handle I made myself, you'll see what I mean about limited success! So, I treated myself to a new hook from my friend Annie at Handcrafted by Annie. I chose a candy twist handled hook, it's lovely and chunky, has a nice weight, and Annie made a little thumb divot in just the right place. I'm very happy with my new hook - so happy in fact, I've ordered 3 more!!!

I love getting presents, so getting this hook was like an extra birthday without getting older!


Thank you Annie! And thank you for mentioning me on your blog :-)

Hopefully I will return to my sampler blanket and rescue it from the clutches of bad stitch counting and I will finish it. I'll post again when I do and let you know the stitches I used too - it's been a fun project for learning new things and experimenting. I just wish experimenting didn't go wrong!

Bye for now - happy hooking xx


Granny's Rainbow


I've started another big project... A granny square blanket. Believe it or not, I've never actually made anything out of granny squares before. When I first started to learn crochet, I began with a granny square, as many people do. I followed the instructions in the book I have, but my granny square was baggy and loose. I was so disappointed that I gave up, threw it in the bin, and vowed that I would stick to kniting. Now, a couple of years later I have decided to face my nemisis. This time, I'm ignoring the instructions and doing it my way (have you got Sinatra singing in your head now too???).
I'm going to show you how I make a granny square that is nice and dense and tight. There's a few little quirks I have decided suit my style, but they may seem a bit odd if you've ever made granny squares before. Stick with me, I promise they turn out lovely. No twisting, no bagginess, just a lovely square.

Here goes... 

Start with a Paul Daniels (aka a magic circle or magic loop) - don't you just hate it when you follow a pattern and end up with a great big hole at the centre of your work? Well, starting with a magic circle means you close the hole completely and have a nice neat start. I've written about the magic circle start in my flower tutorial - if you need the instructions, have a look here.
The basic granny square is made of clusters of three trebbles together. Now, when I follow patterns they always say chain 3 to start, that will count as a treble. But I find 3 chain is a bit too long for my trebles, and I end up with a lumpy bumpy beginning which really irritates me. So, I start with 2 chain into the magic circle, then do a treble. 

Another little pet hate of mine is being able to see those chain starts, so I hide mine by making the chain the middle stitch of the cluster. Make sense? Well, follow me...

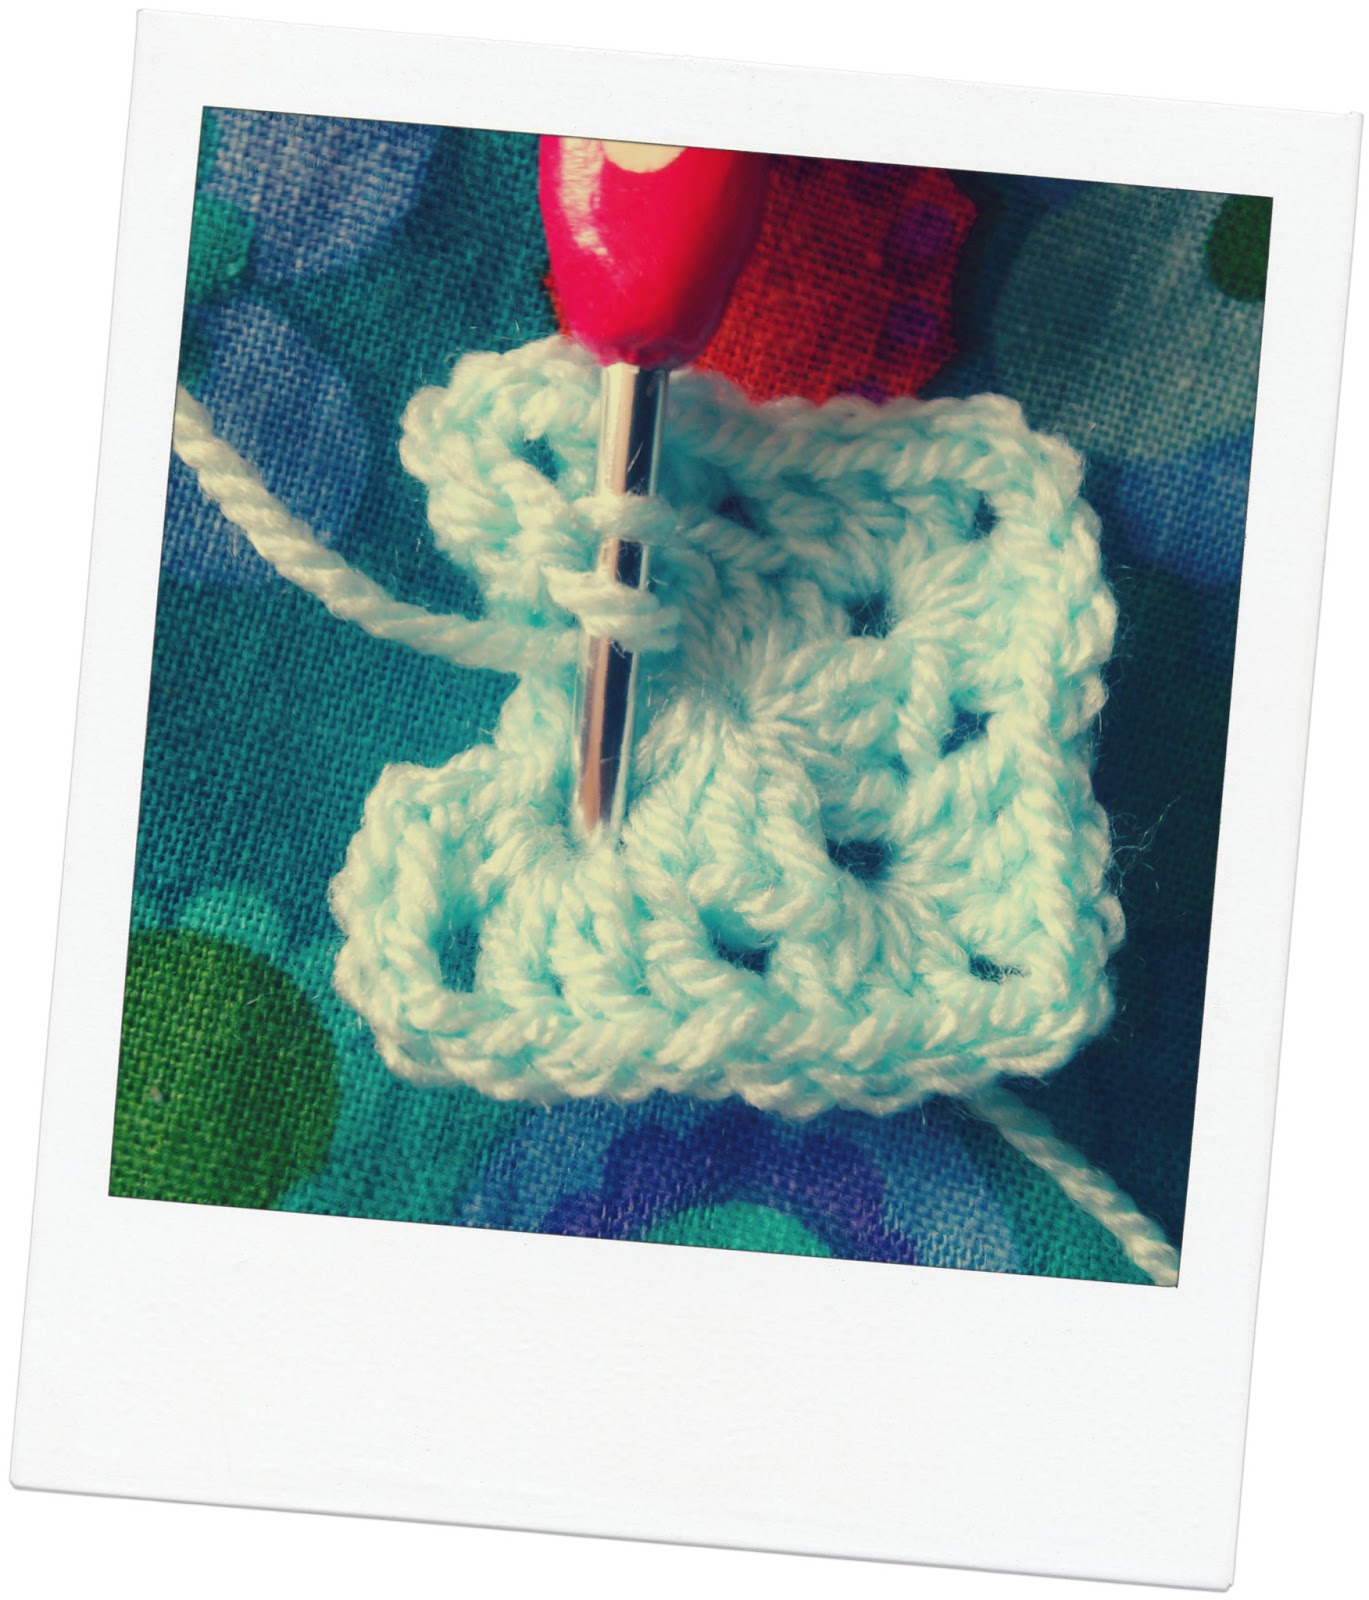
Do your chain 2 and one treble. That will become a cluster at the end. We want 4 clusters to begin our square, and we want 4 corners. I like a 2 chain corner - it keeps your work nice and tight. Don't want baggies do we? So do 2 chain (corner), 3 trebles, 2 chain (corner), 3 trebles, 2 chain (corner), 3 trebles, 2 chain (corner), and 1 treble that will complete our first cluster, which right now only has 2 stitches, remember?
So, now we have 12 stitches in our magic circle, we can pull it tight and slip stitch the cluster we began with together. I used to struggle to get my magic circles to close up completely, then by chance, I realised that you pull it tight BEFORE you slip stitch the ring together. Now why wasn't that made clear in the instructions I learned from?
Now we need to slip stitch into the corner space (the 2 chain) so we can begin the next round.
Round one is complete, now for round two. Again I'm going to start with 2 chain that will count as my first treble, then do 1 treble and make a corner, then make a treble cluster (3 trebles).
Now make a treble cluster in the next corner space - here I deviate from the pattern I used when I had my first try at granny squares. I don't put a 1 chain gap between my clusters. This means I end up with a nice tight neat granny square at the end. 

Keep making a cluster, 2chain (corner) cluster in all the corner spaces - make sure you count your corners, you want 4 corners! I know, it sounds obvious since we are making a square, but it's better to check now that find you're making a pentagon on the final round. I know, I've been there, and done it! Counting isn't my strong point ;-)

When you get to the last corner (or first corner - depending on how you look at it) you need to do one more treble to finish off that cluster. Remember we are hiding the chain start in the middle of the cluster? This feels a bit clumsy as you do it, but honestly, it turns out good.

Slip stitch into the top of your starting chains and slip stitch into the corner space again ready for round three.
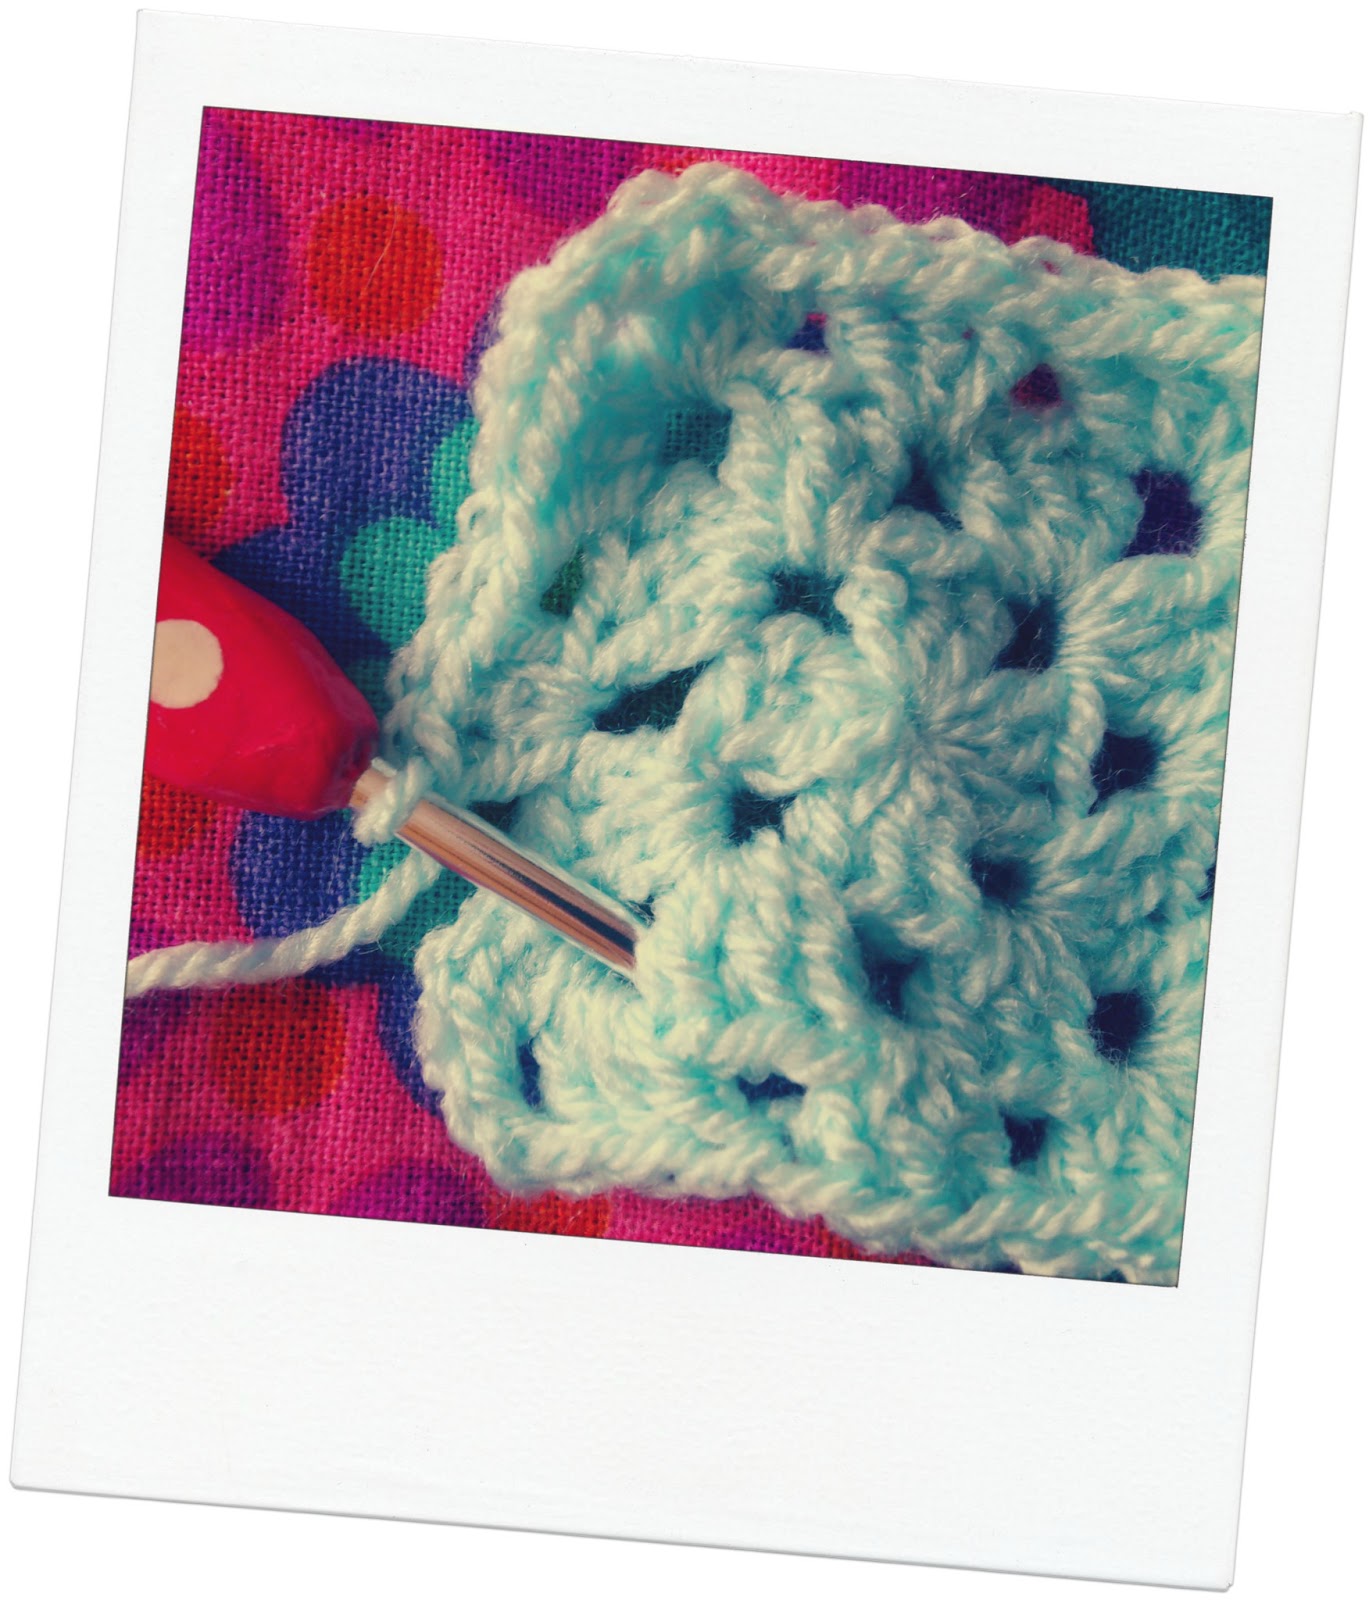
Now repeat the same as before... 2 chain, one treble, 2 chain (corner), cluster of 3 treble.


Remember we didn't do a chain inbetween our clusters on the previous round? But there is a little gap between them just the same. Now we will work into that gap to make a cluster.

Oops - not a very clear photo!

Now we need to make a cluster, corner, cluster in the chain space of the corner.
Continue repeating this pattern until you reach your starting point, then do one final treble to complete your starting cluster, and slip stitch together. 
That's round three complete.

Slip stitch across into your next corner space, and repeat round three, adding a cluster in every space between clusters on the previous round. You've got the beginnings of a granny square!
So, keep going, doing the same...
Until you have a square of a size you like. I'm making mine with 7 rounds. I will join them together at the end.
When you're done, finish off by cutting your yarn - leave a long enough tail to sew with! - and pulling the thread right through the final slip stitch.

Now to finish off the square we need to sew in our ends. Since this is going to make a blanket, I will sew in my ends really securely, because this finished blanket will no doubt be going through the washing machine fairly often. And remember, since this is a blanket, it's quite possible people will see the back as well as the front of it, so make your sewing in nice and neat. So stitch into the back of your stitches - make sure you don't got right through to the front, you want to sew into the middle of the stitches or else you'll see your sewing on the front. Stitch back and forth a few times before you cut off your thread as close to your work as possible. Do be careful though, you don't want to accidentally cut a crochet stitch.


It's a horrible job to do, but if you sew in your ends as you go, you won't have a billion of the damn things at the end of your project. For me, that is the kiss of death on any project - it makes me weep. If I'm faced with 225 squares with ends to sew in, it will stay in my basket forever and never get finished. I've learned that lesson the hard way! 


There's a certain satisfaction in being able to look at your square from front or back and seeing lovely neat work.

The back
And the front

So, now you know how to make a non-baggy granny. Now to make another 224 of them. Eeeek! It's going to be gorgeous though. Just need to keep saying that to myself!

I will be working on this blanket until Christmas I think. But it's a pattern that with practice you can do while you watch the TV or a movie - I can even watch my favourite foreign movies with subtitles while I make my grannies now. That's my kind of project :-)

Hope you have a go too - let me know how it turns out. If a blanket seems a bit too daunting, the granny squares can make a lovely cushion cover - you could do just one big granny cover or a patchwork of smaller ones. Hmmm... I think I like that idea ;-)


I love to hear your comments about my work, I read them all and try and reply as soon as possible to any queries. Happy hooking :-)

And finally, before I go, I'd like to credit the source of my fab background fabric in all the pics - it's a brilliant piece of retro fabric from my friend at Rainbow Vintage Fabrics. Have a look and see what yummy fabulousness they have.